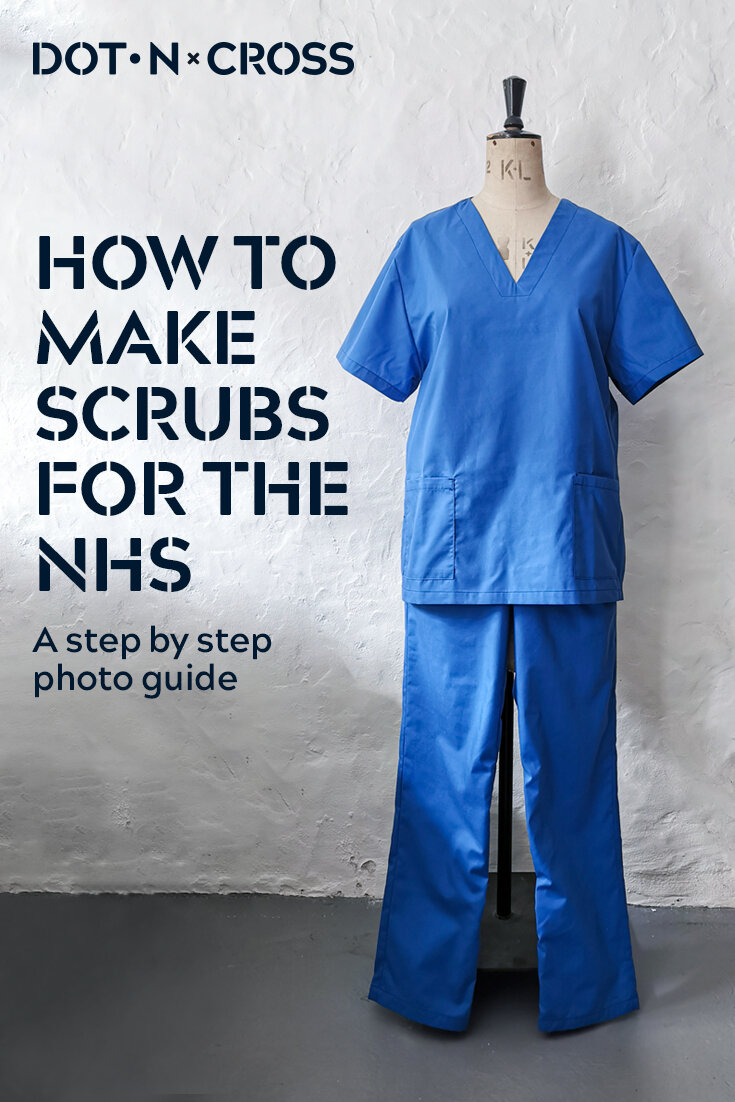
HOW TO MAKE SCRUBS FOR THE NHS - A STEP BY STEP PHOTO GUIDE
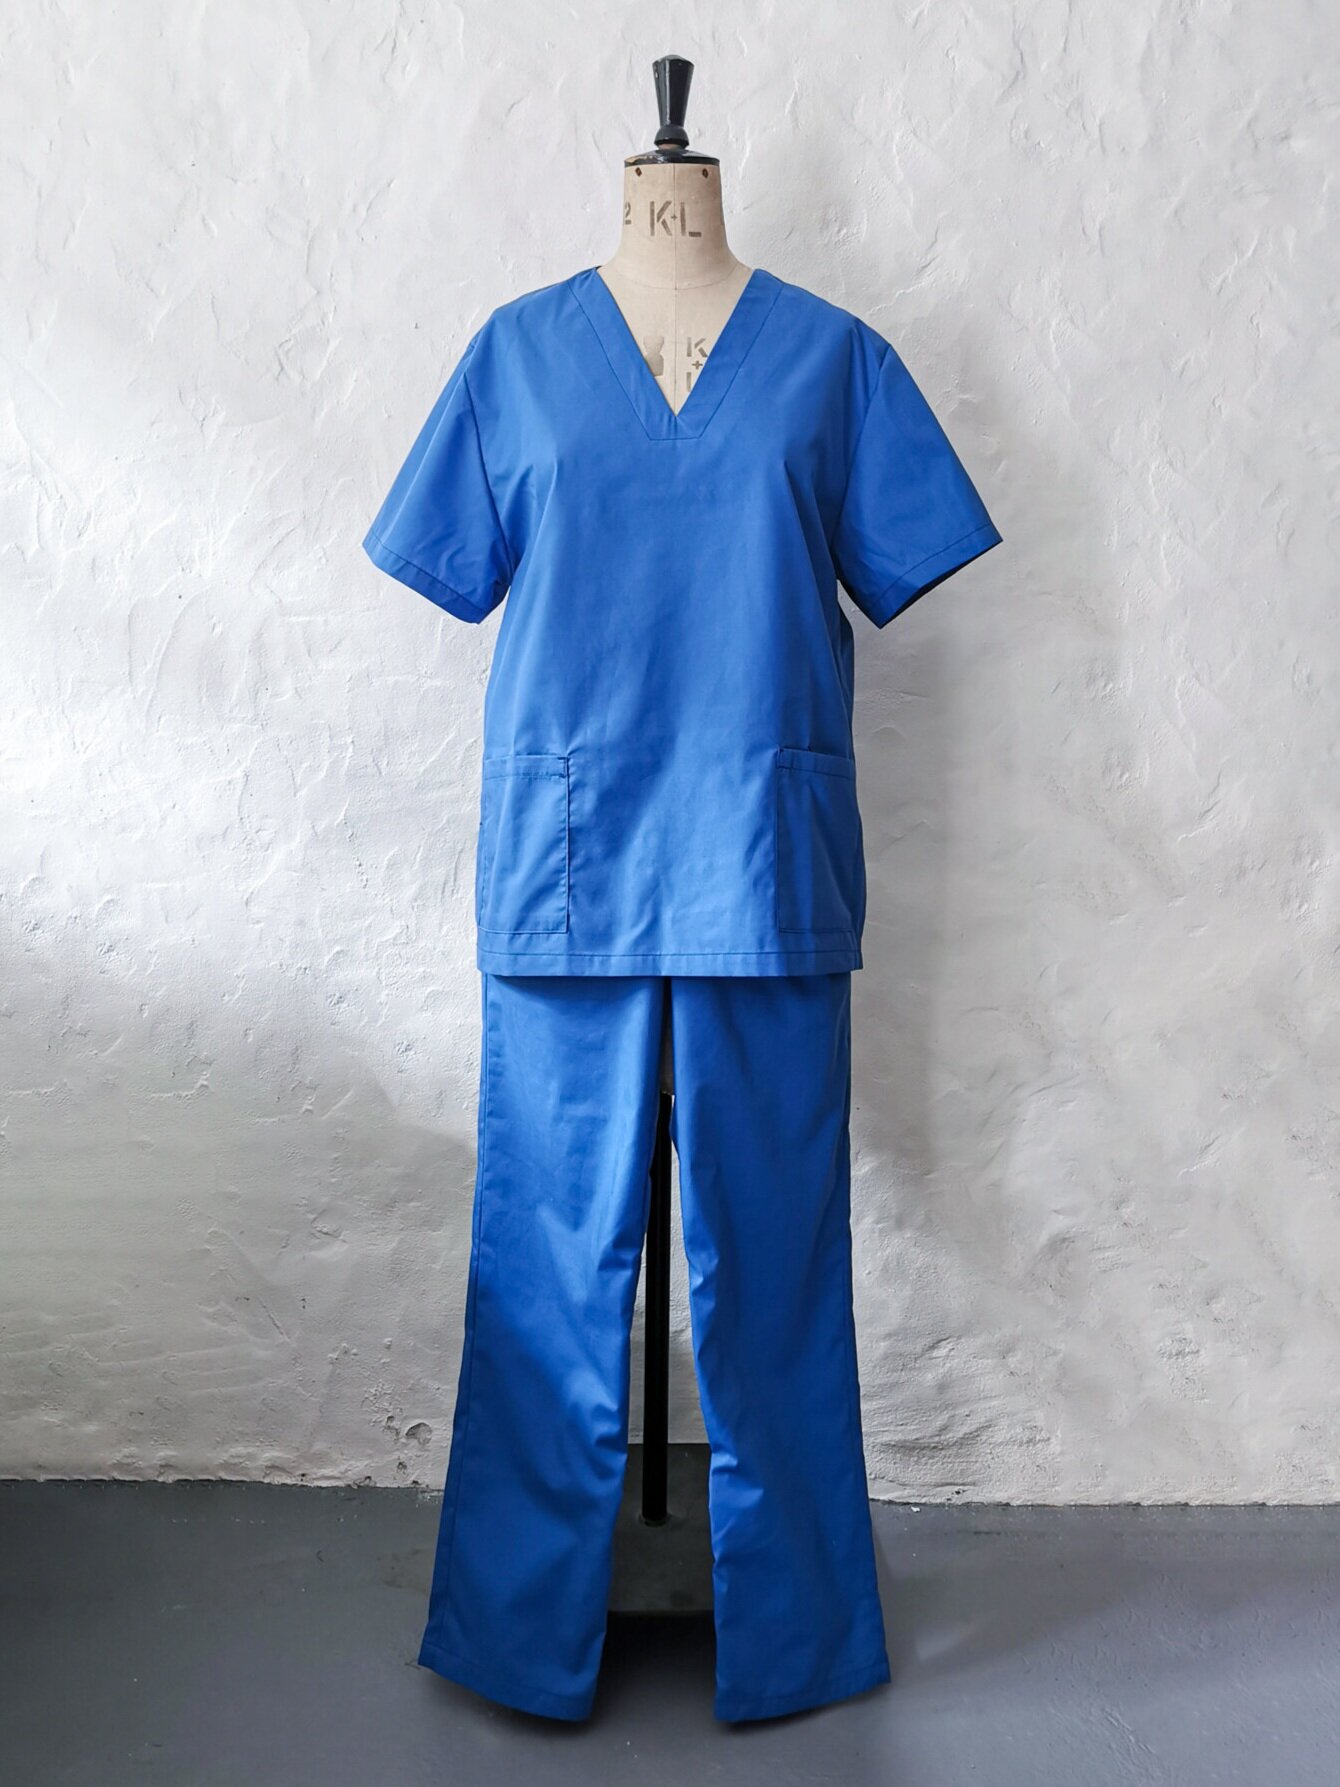
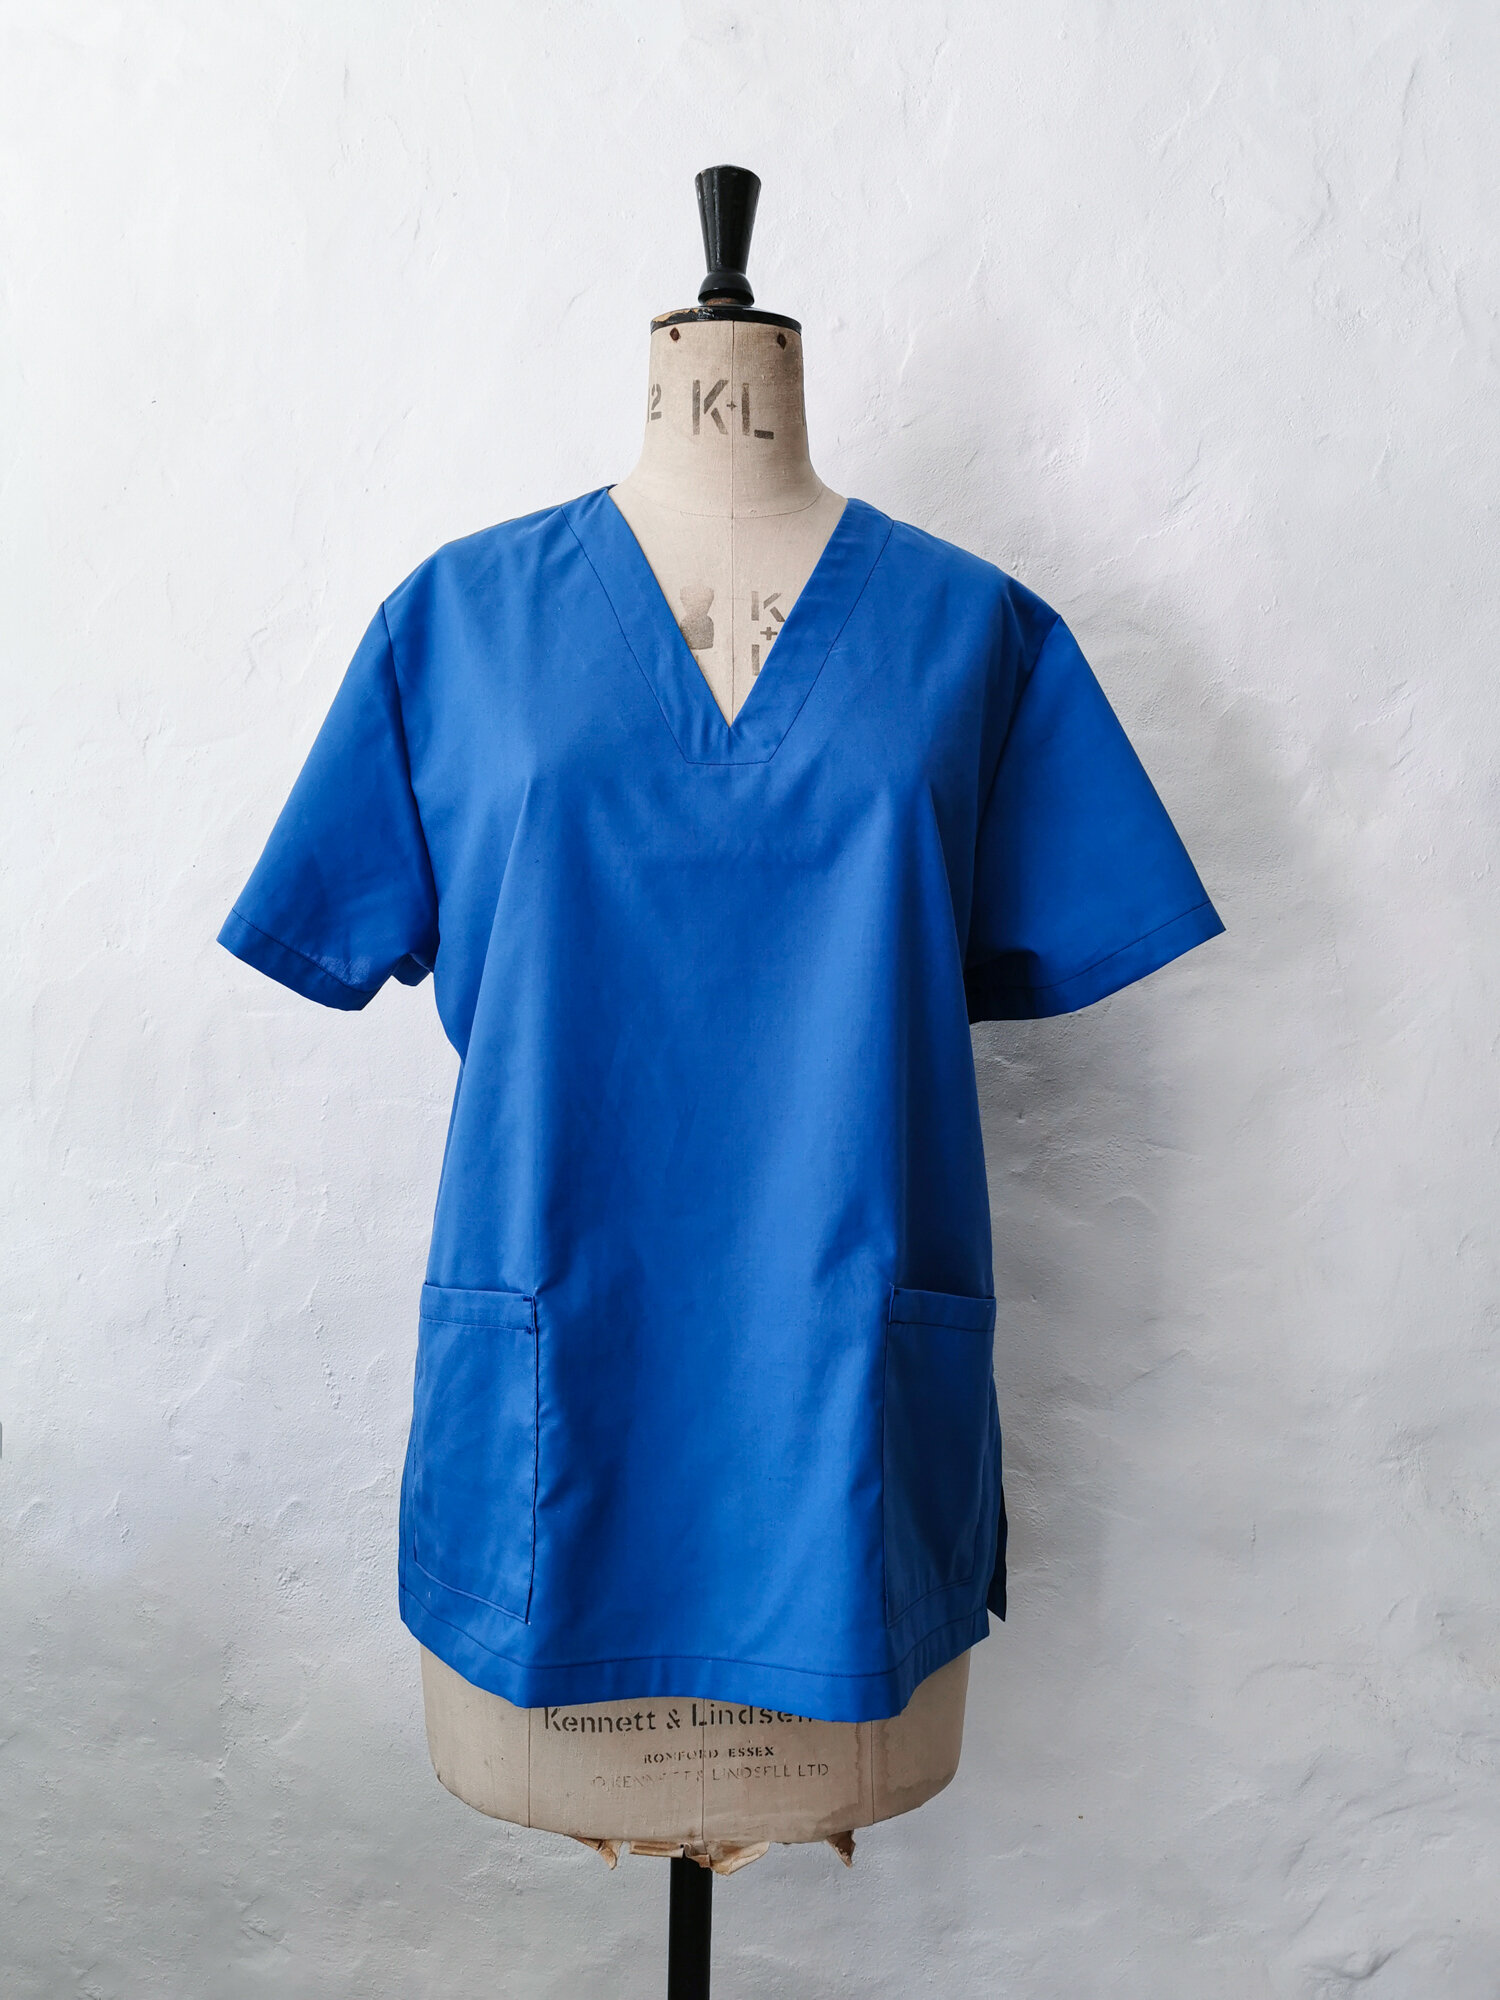
This guide will help you create a set of high quality scrubs for the NHS that are hard wearing enough to withstand everything that is being thrown at our amazing NHS and care staff. These scrubs need to be washed at high temperatures and reused over and over. Lets make them the best they can be, so your time, effort, and precious resources are making as much of a difference as possible.
You can download the free pattern by clicking on the photo. It is a tweak of the Sew Different free download, with an altered sleeve, trouser pocket and drawstring waist. It is also similar to the Patterns Boutique pattern, so whichever pattern you have, you should find these instructions helpful.
Please don’t print out these instructions as it will waste a lot of paper and ink, instead have them up on your iPad or laptop as you are sewing. That way you can zoom into the photos too!
These instructions are free to be used in conjunction with several sewing patterns that are circulating online at the moment. Please distribute far and wide to help others with sewing up their scrubs. Please do not offer these instructions for sale, they are free and should remain so.
SEAMS ALLOWANCE: All seams are 1cm unless otherwise stated.
SEAM FINISHING: Seams should be finished with overlock, either on an overlocker or with an overlocking stitch on your sewing machine. The overlock stitch should encase the raw edge of the fabric. This is very important as the scrubs will be washed daily at high temperatures and need to withstand a lot of wear and tear!
FABRICS: Suitable for poly cottons, ideally 80/20 or 65/35 and between 115 & 125gsm. Staff are wearing them under all the other PPE so it needs to be lighter weight but able to withstand a 90 degree wash (very important).
STITCH LENGTH: 2.5-3.5mm
THREAD TYPE: Polyester 120s
LABELS: Please label both top and trousers with the size. Either by embroidering on facing and waistband, or stitching in a label.
FINISHINGS: Back tack at the start and end of every seam you sew to ensure it doesn’t unravel.
WAISTBAND: Please do NOT use elastic in the waistband as it perishes when washing at such high temperature. Instead, insert a drawstring, 1-3cm wide, follow make instructions for how to do this.
SIZING: Please check with your regional coordinator to see what sizes are needed in your area.
PRE-WASHING FABRIC: See advice on your regional Facebook group for whether pre-washing fabric is required. Often you can do a 20x20cm swatch test and cut a size larger than you wish to make if the fabric is shrinking.
SCRUBS TOP INSTRUCTIONS
01. Lay both front facing and back facing right side down on the ironing board. Place the fusing sticky side down on top of the corresponding piece.
02. Lay a scrap piece of fabric on top (this is to protect your iron), taking care not to move the fusing out of place. Iron to fix the fusing to the facing pieces.
03. If you are embroidering the size, mark where the centre back sits on the back neck facing, and embroider the size. It should just be the letter, eg: S for small. The back neck facing will be topstitched 4cm down from the cut edge, so either make your embroidery above or below that line.
04. With right sides together, sew front facing to back facing at the shoulder seams, press open.
05. Overlock the outside edge of the facings.
06. Overlock the following seams on the following pieces: Underarm seams of the sleeves, side seams of the front and back (curve off the point as you overlock), sides and bottom of the patch pockets.
07. Iron a 1cm fold to the upper edge of the patch pockets, press a second fold 2cm and topstitch 2mm from this fold.
08. Press the marked seam allowance (1.5cm) to the inside of the sides and bottom of the patch pockets.
09. Pin the patch pockets to the right side of the front where marked on the front pattern piece. (7cm up from hem edge and 6cm in from side)
10. Stitch 2mm from the folded edge around the sides and bottom. Bar tack at the top as shown in the photo, or sew a triangle stitch to reinforce the opening.
11. With right sides together, sew the front to the back at the shoulder seams, overlock together and press to the back.
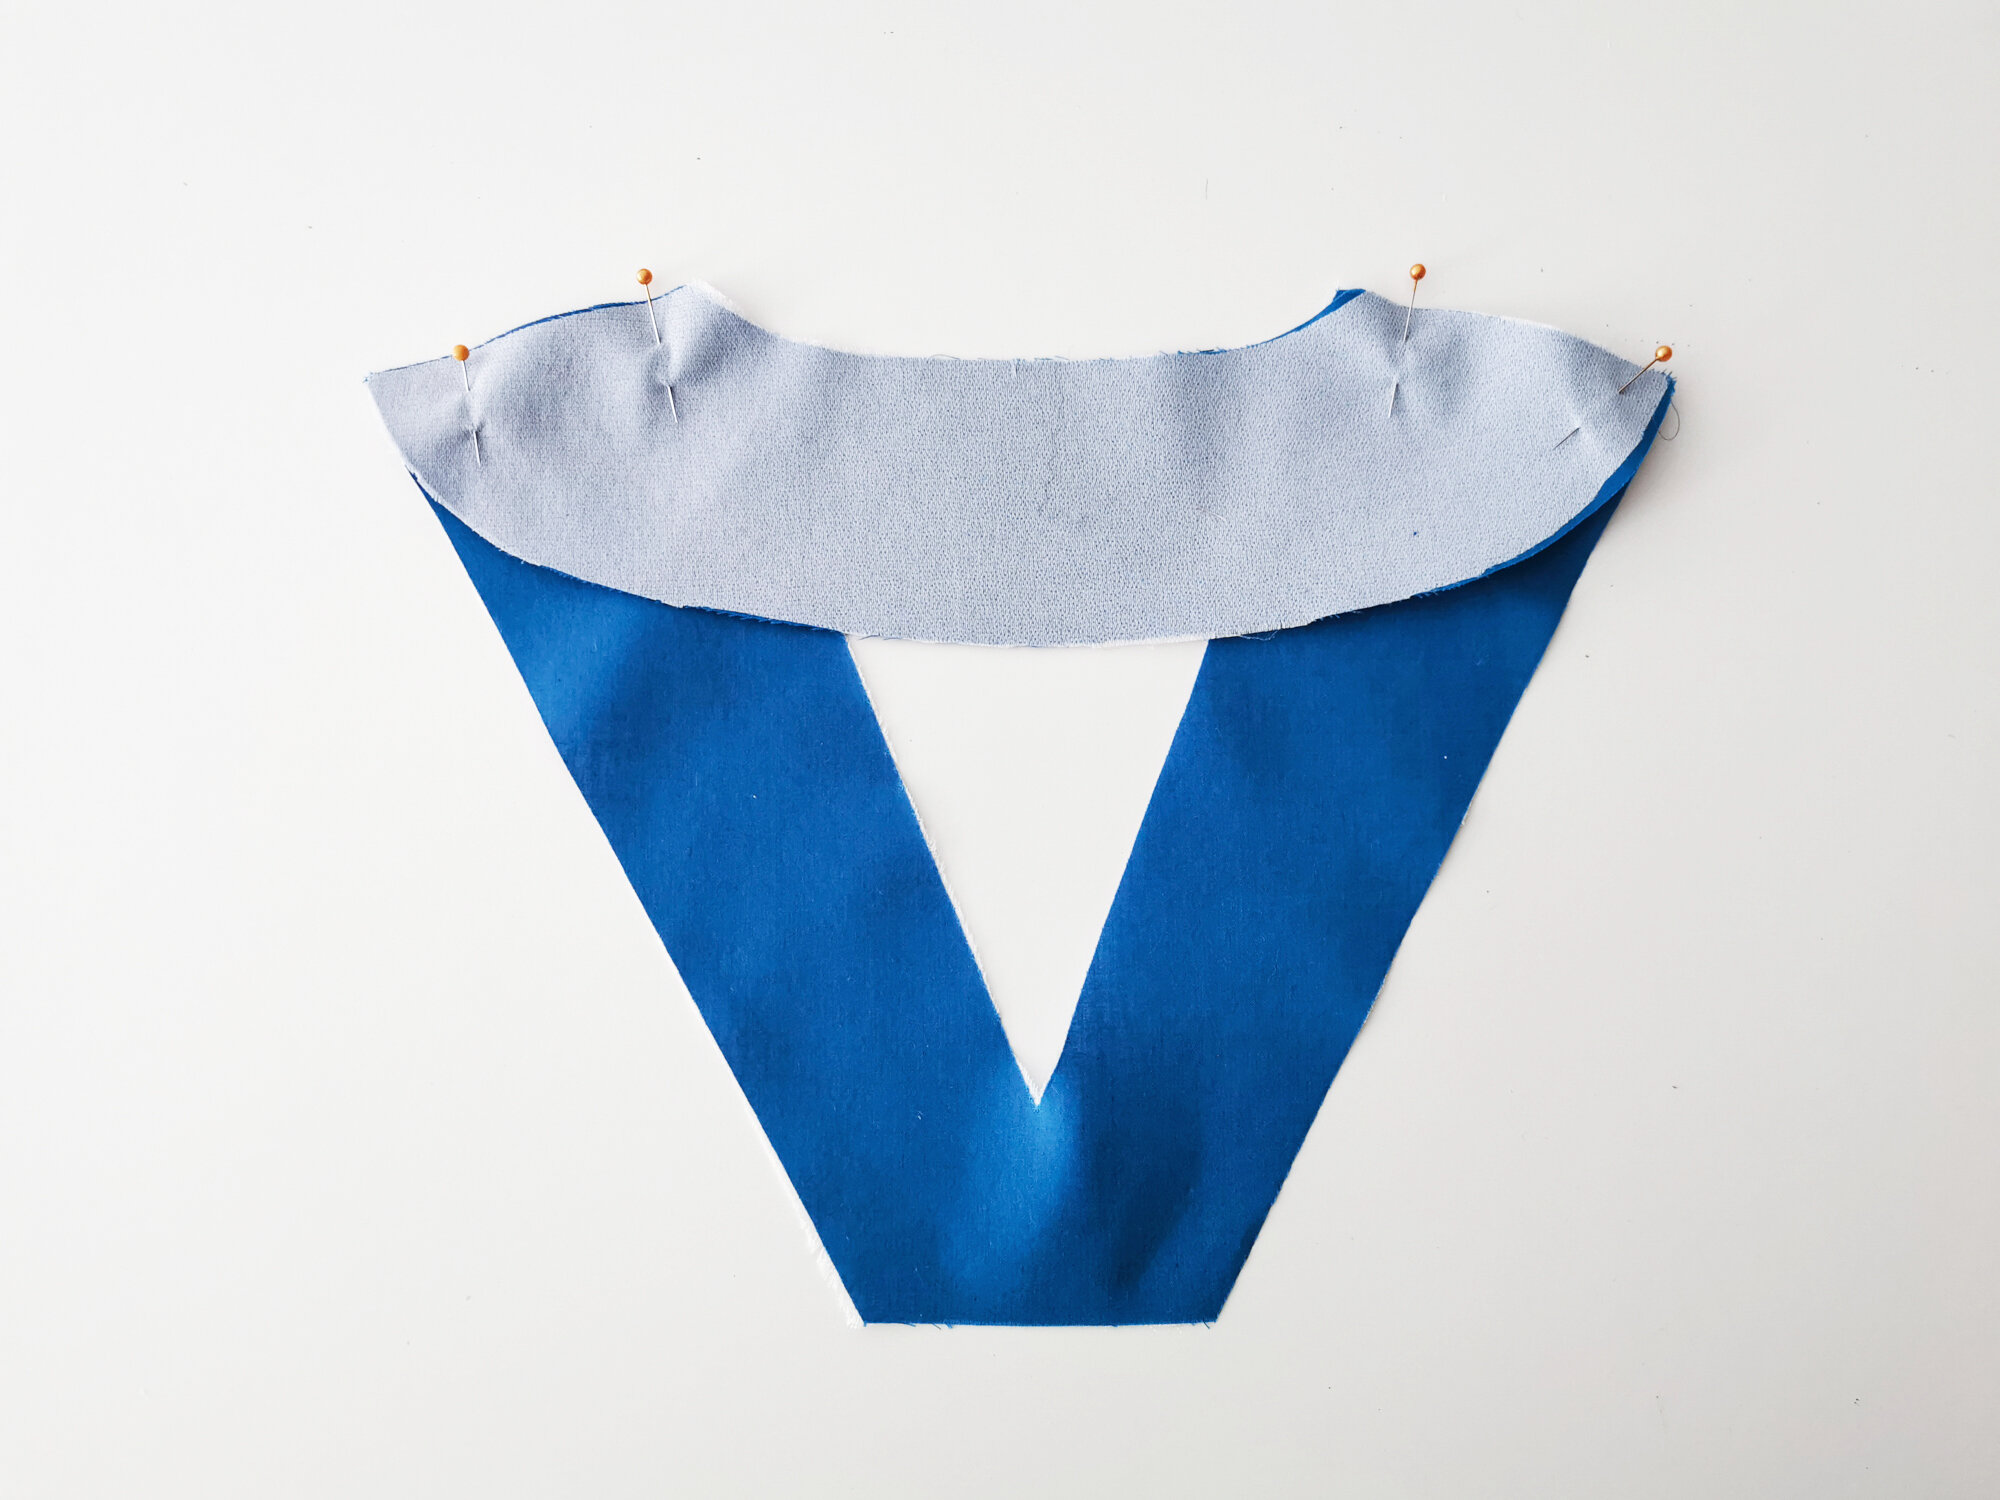
12. With right sides together, pin the facings to the neckline.
13. It is advisable to measure where the ‘V’ finishes at CF and mark it with chalk, an invisible pen, or a pin, so you know where you are aiming for. Start sewing at one shoulder, when you get to the marked V point, leave the needle in, lift the sewing machine foot and pivot on this point, then continue sewing.
14. Cut notches in the neck seam allowance so that it will turn easily to the wrong side. Snip at centre front, to 1mm from the stitch line (careful not to cut through the stitch line) so that the ‘V’ will turn well.
15. Under-stitch the facing to the seam allowance, 2mm from the neck seam. Start from 5mm from point of V, stitch all the way around the neckline until you get to 5mm away from the V on the other side.
16. Turn the facing to the inside and press so that it lays flat.
17. Pin facing in place, then topstitch 3cm from the neckline edge. If you have an invisible pen you could use this to mark on the topstitching line to ensure it is neat. If not, then line up the neckline edge with the 3cm line on your sewing machine foot plate.
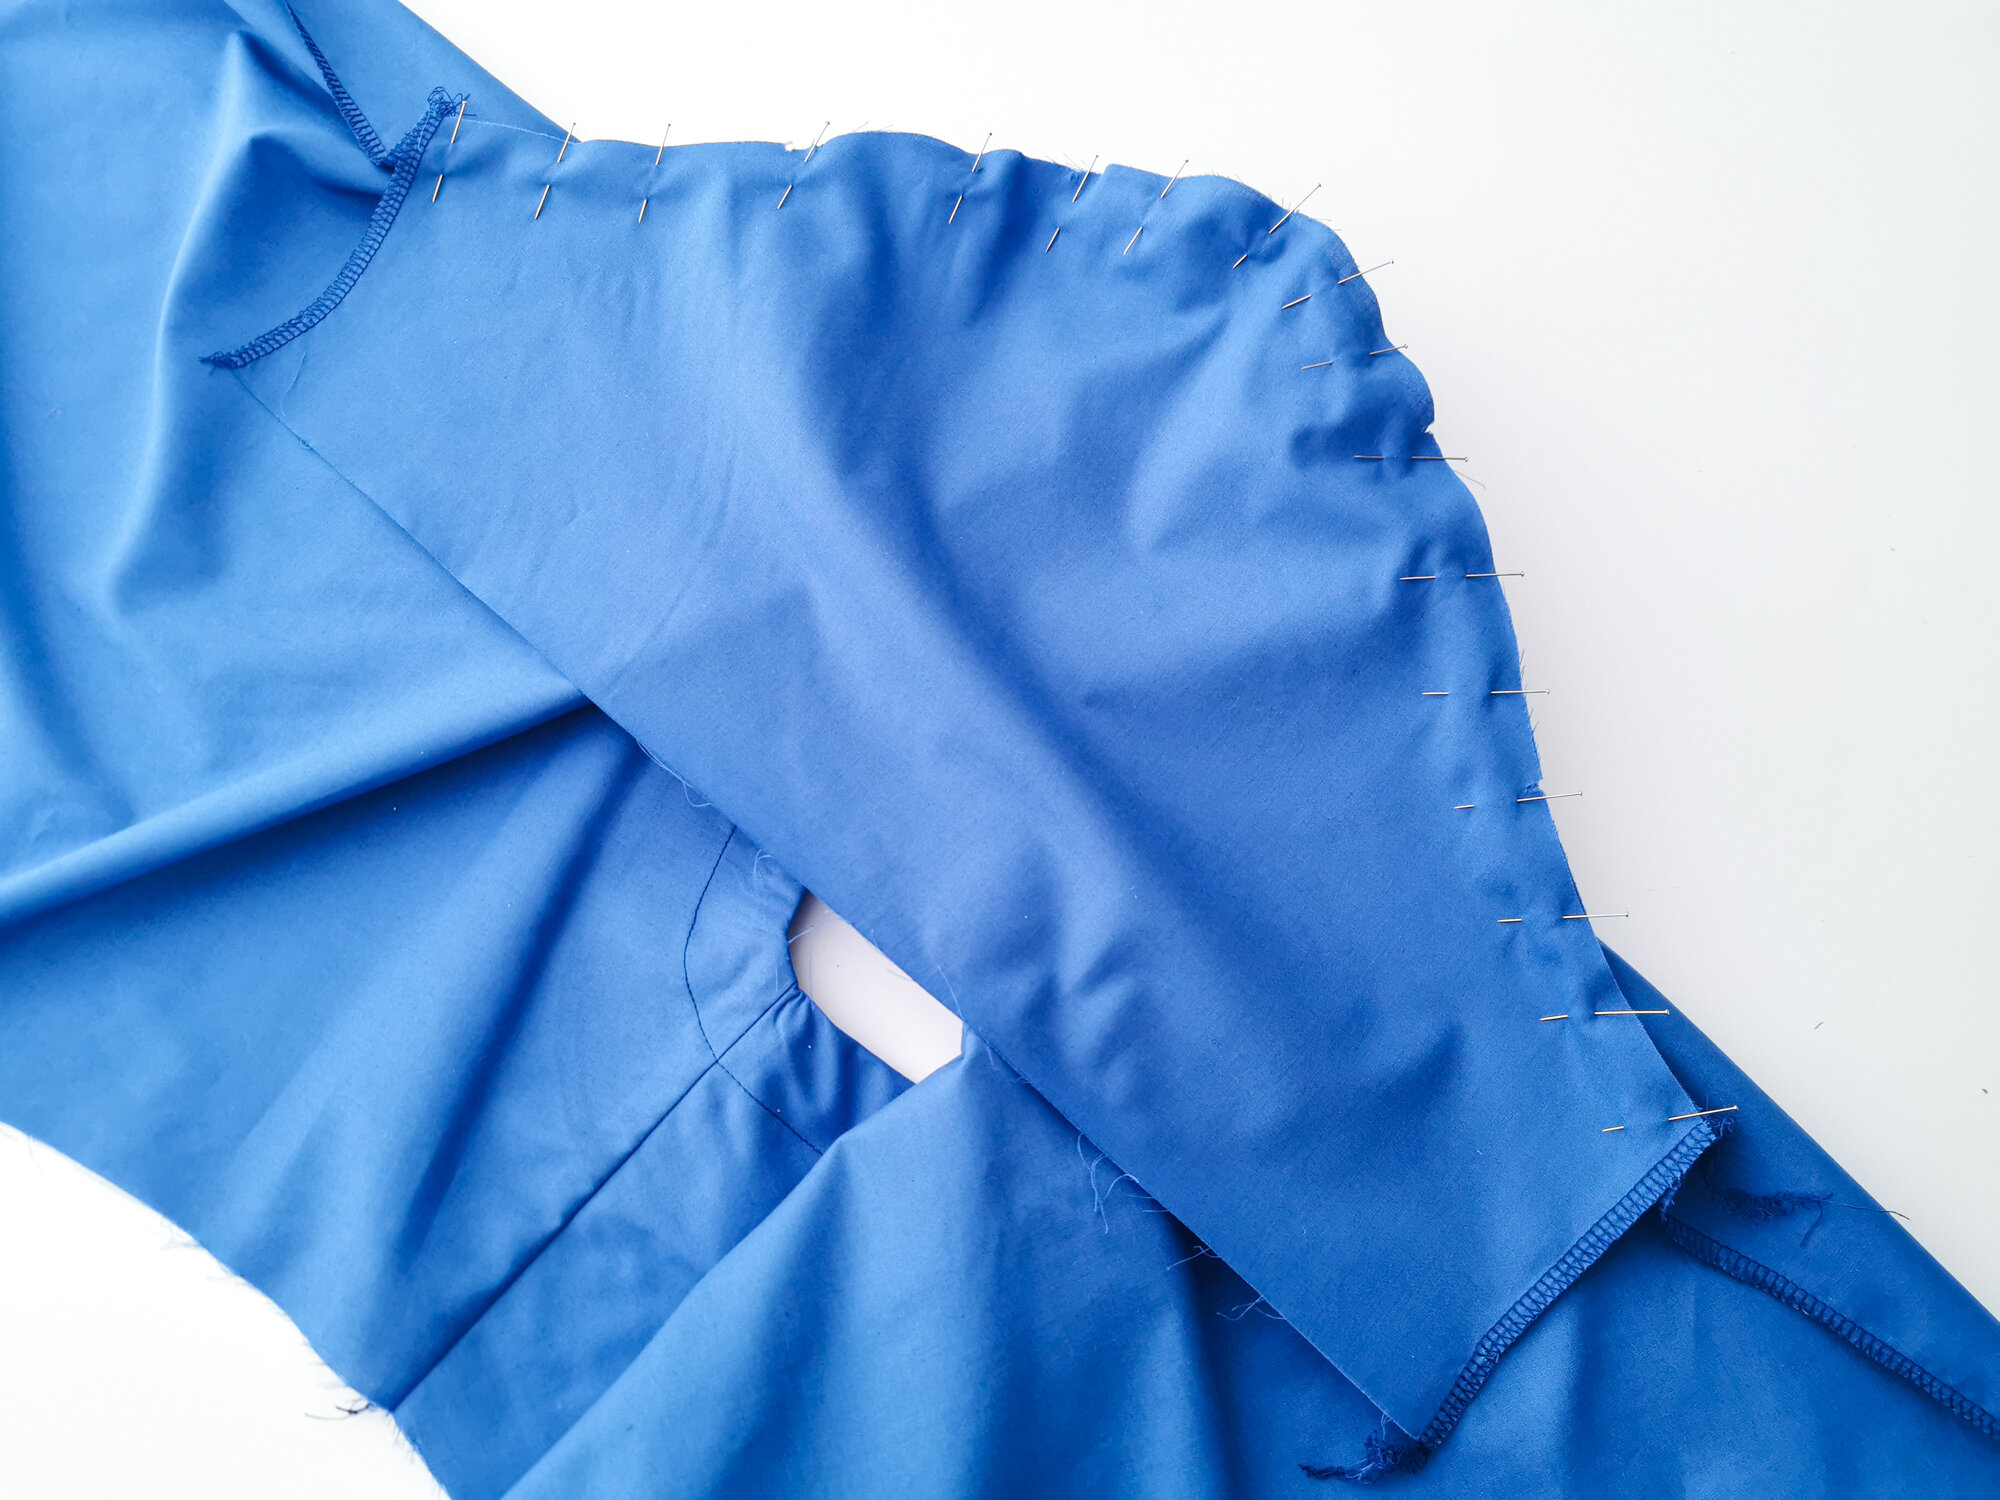
18. Leaving the side seams open, with right sides together, pin the sleeves to the armholes. Use plenty of pins, and I find it helps to pin from the sleeve side. Follow the notches to position the shoulder of the sleeve to the shoulder of the main body.
19. Sew and then overlock sleeves and armhole together.
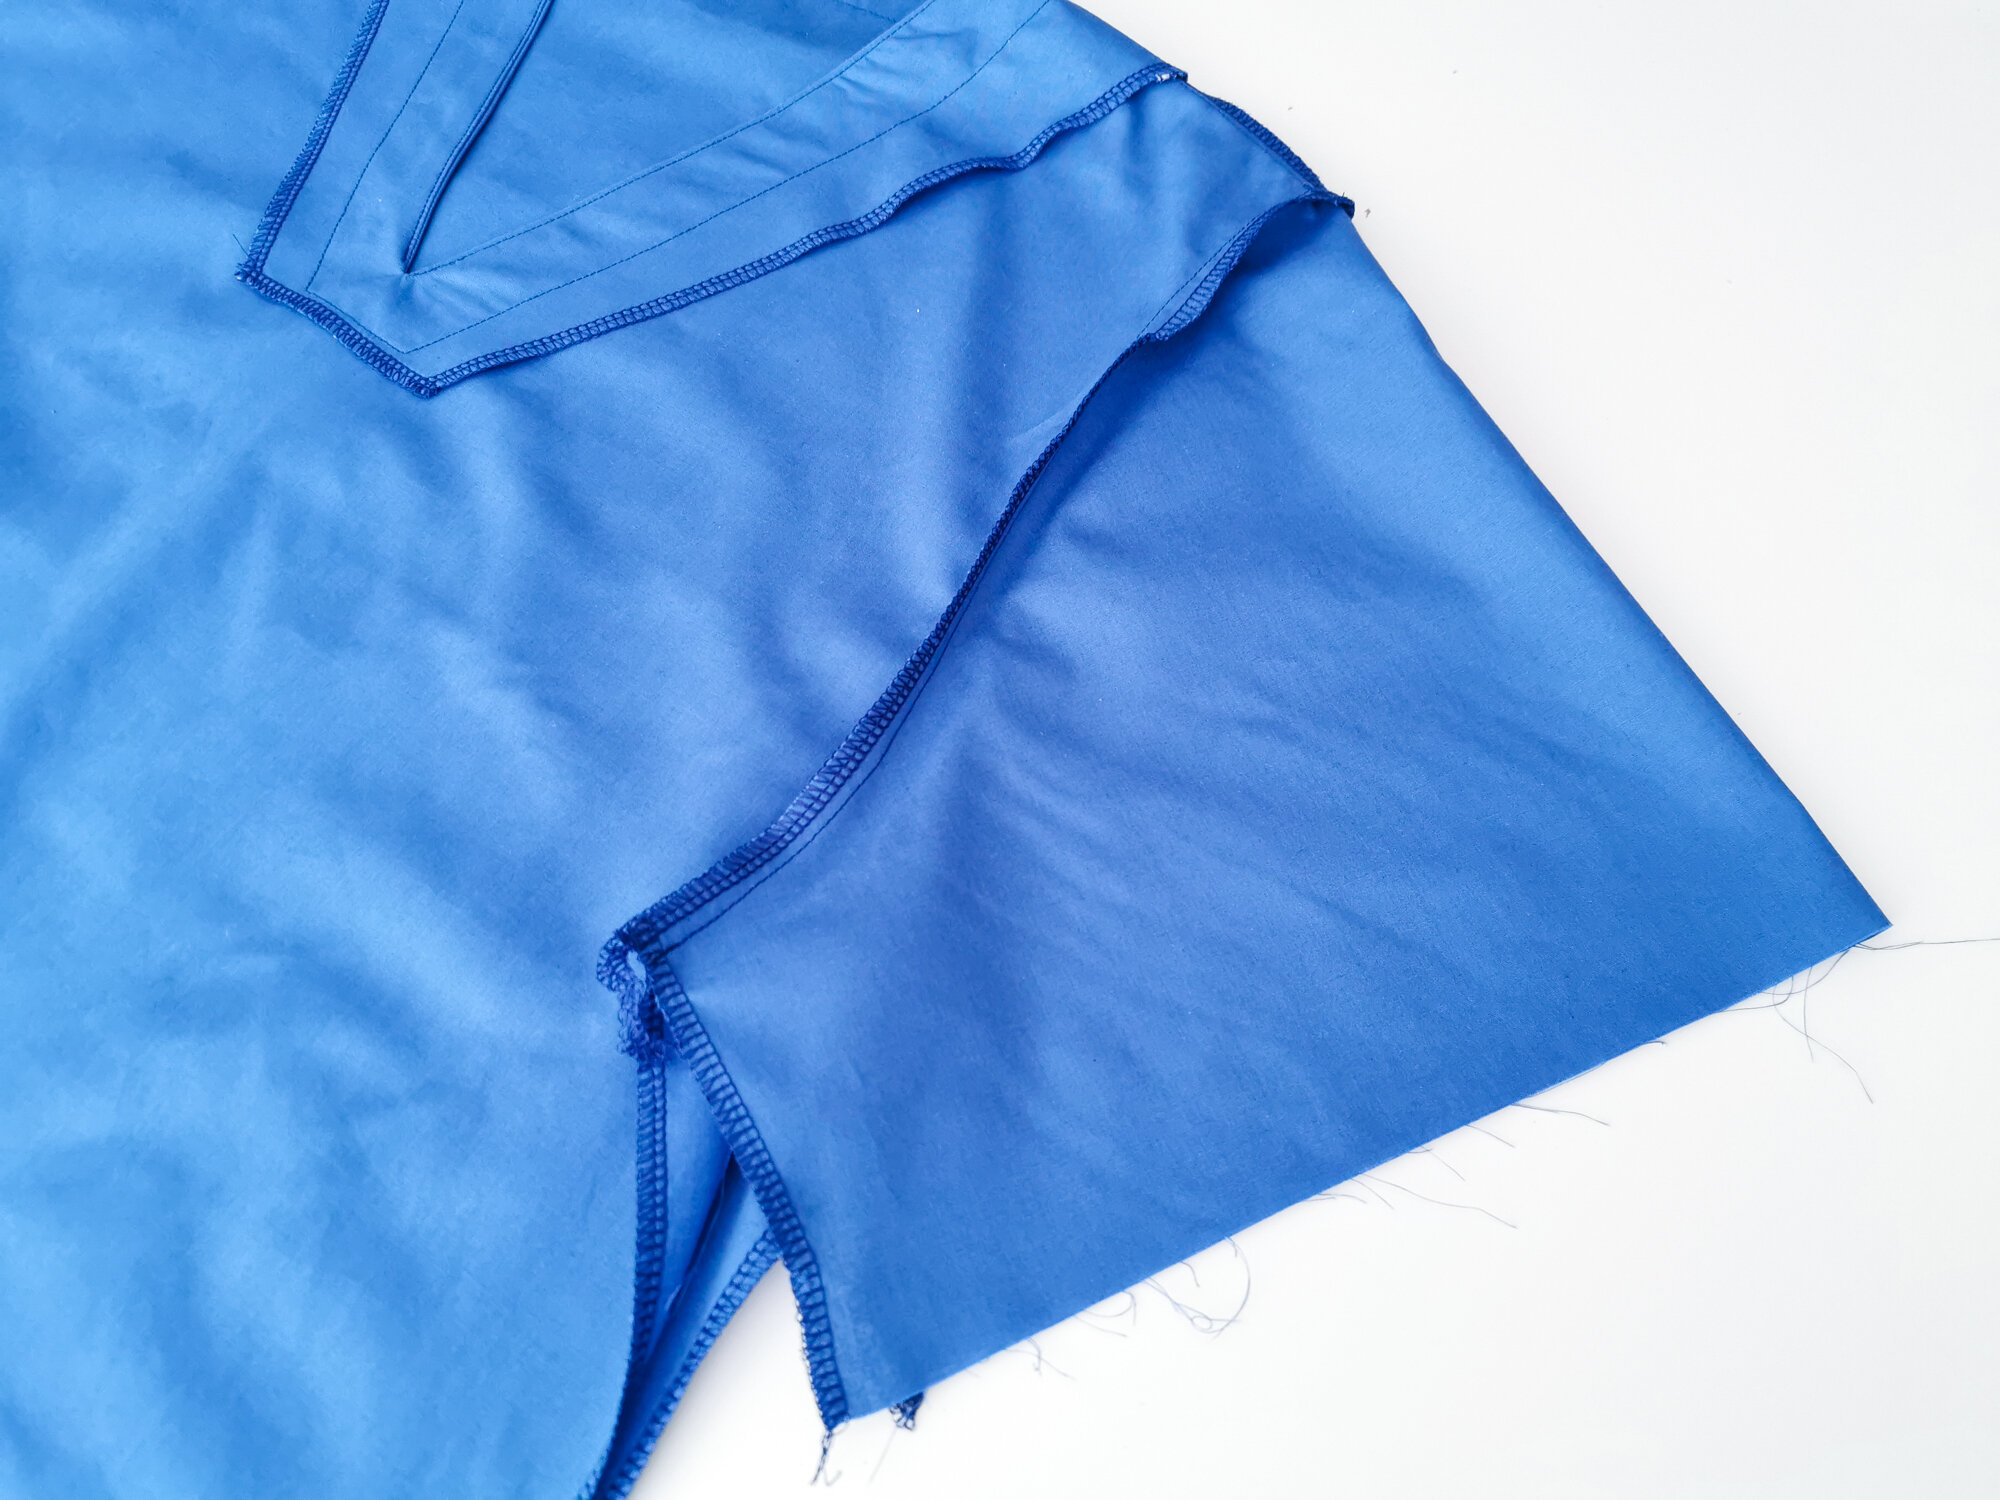
20. With right sides together, sew the side seams along the underside of the sleeve and down to the top of the split on the body. Split should measure 16cm from the cut edge of the front and back on all sizes.
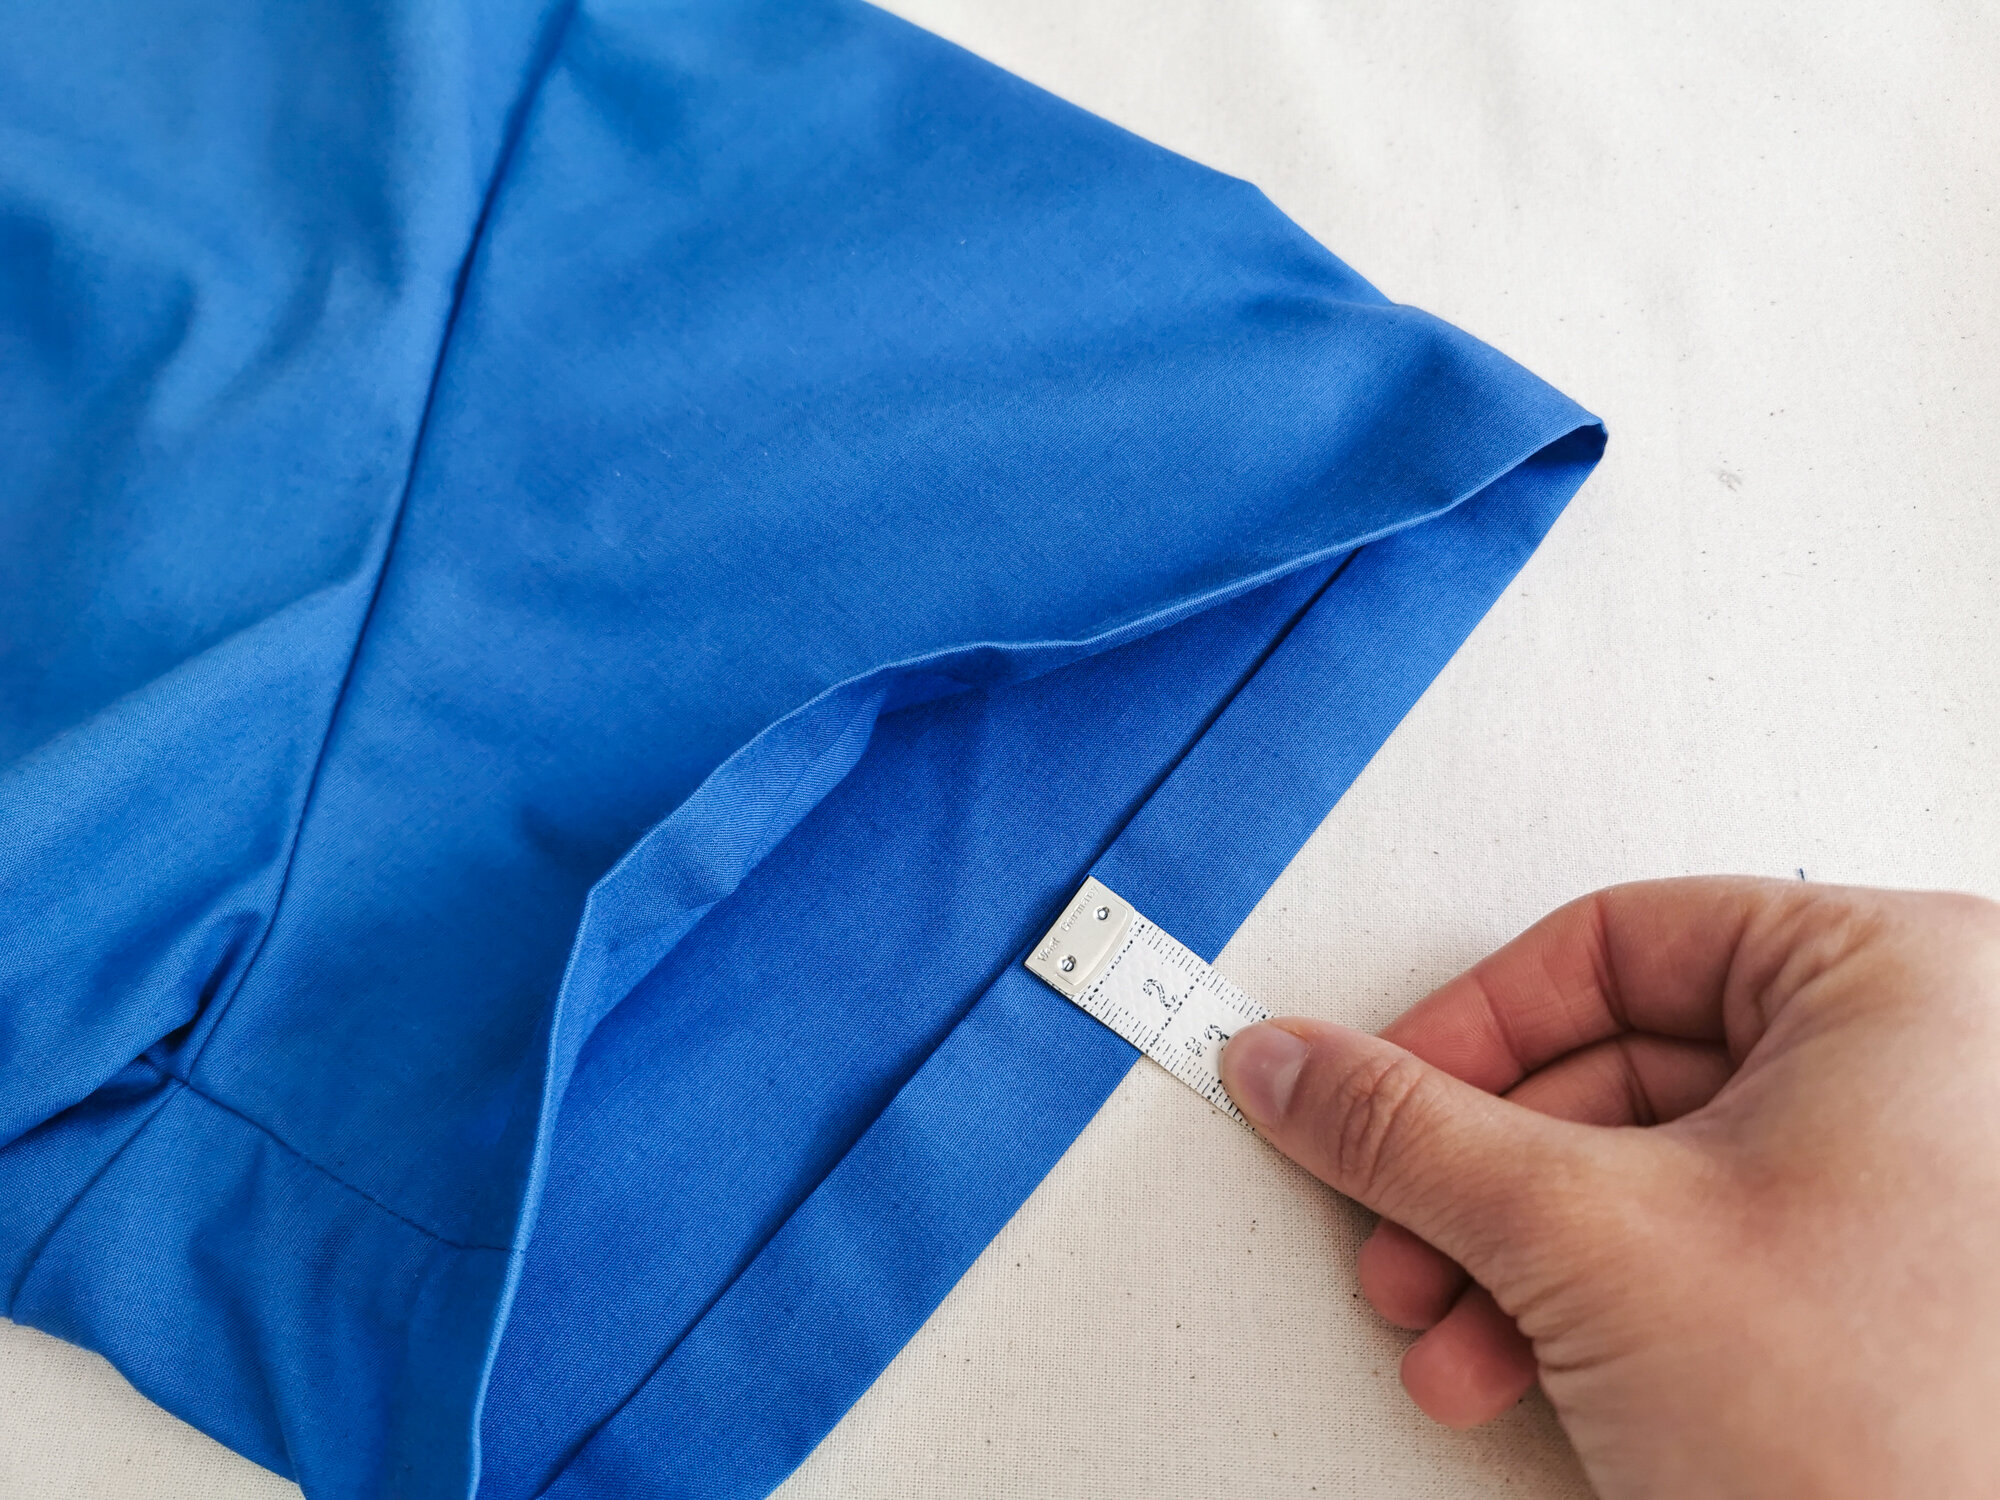
21. Iron side seams open and slits open, they should measure 2.5cm wide at the hem.
22. Topstitch 1.5cm from pressed edge around the slits to hold them in place, and bar tack above the slits to stop them ripping.
23. On the front, press the hem up 1cm and then 2cm and topstitch 2mm from the fold. Do the same on the back.
24. Press the sleeve hems up 1cm and then 2cm and topstitch 2mm from the fold. Well done - the top is finished, you are half way there. Just the trousers to go!
SCRUBS TROUSER INSTRUCTIONS
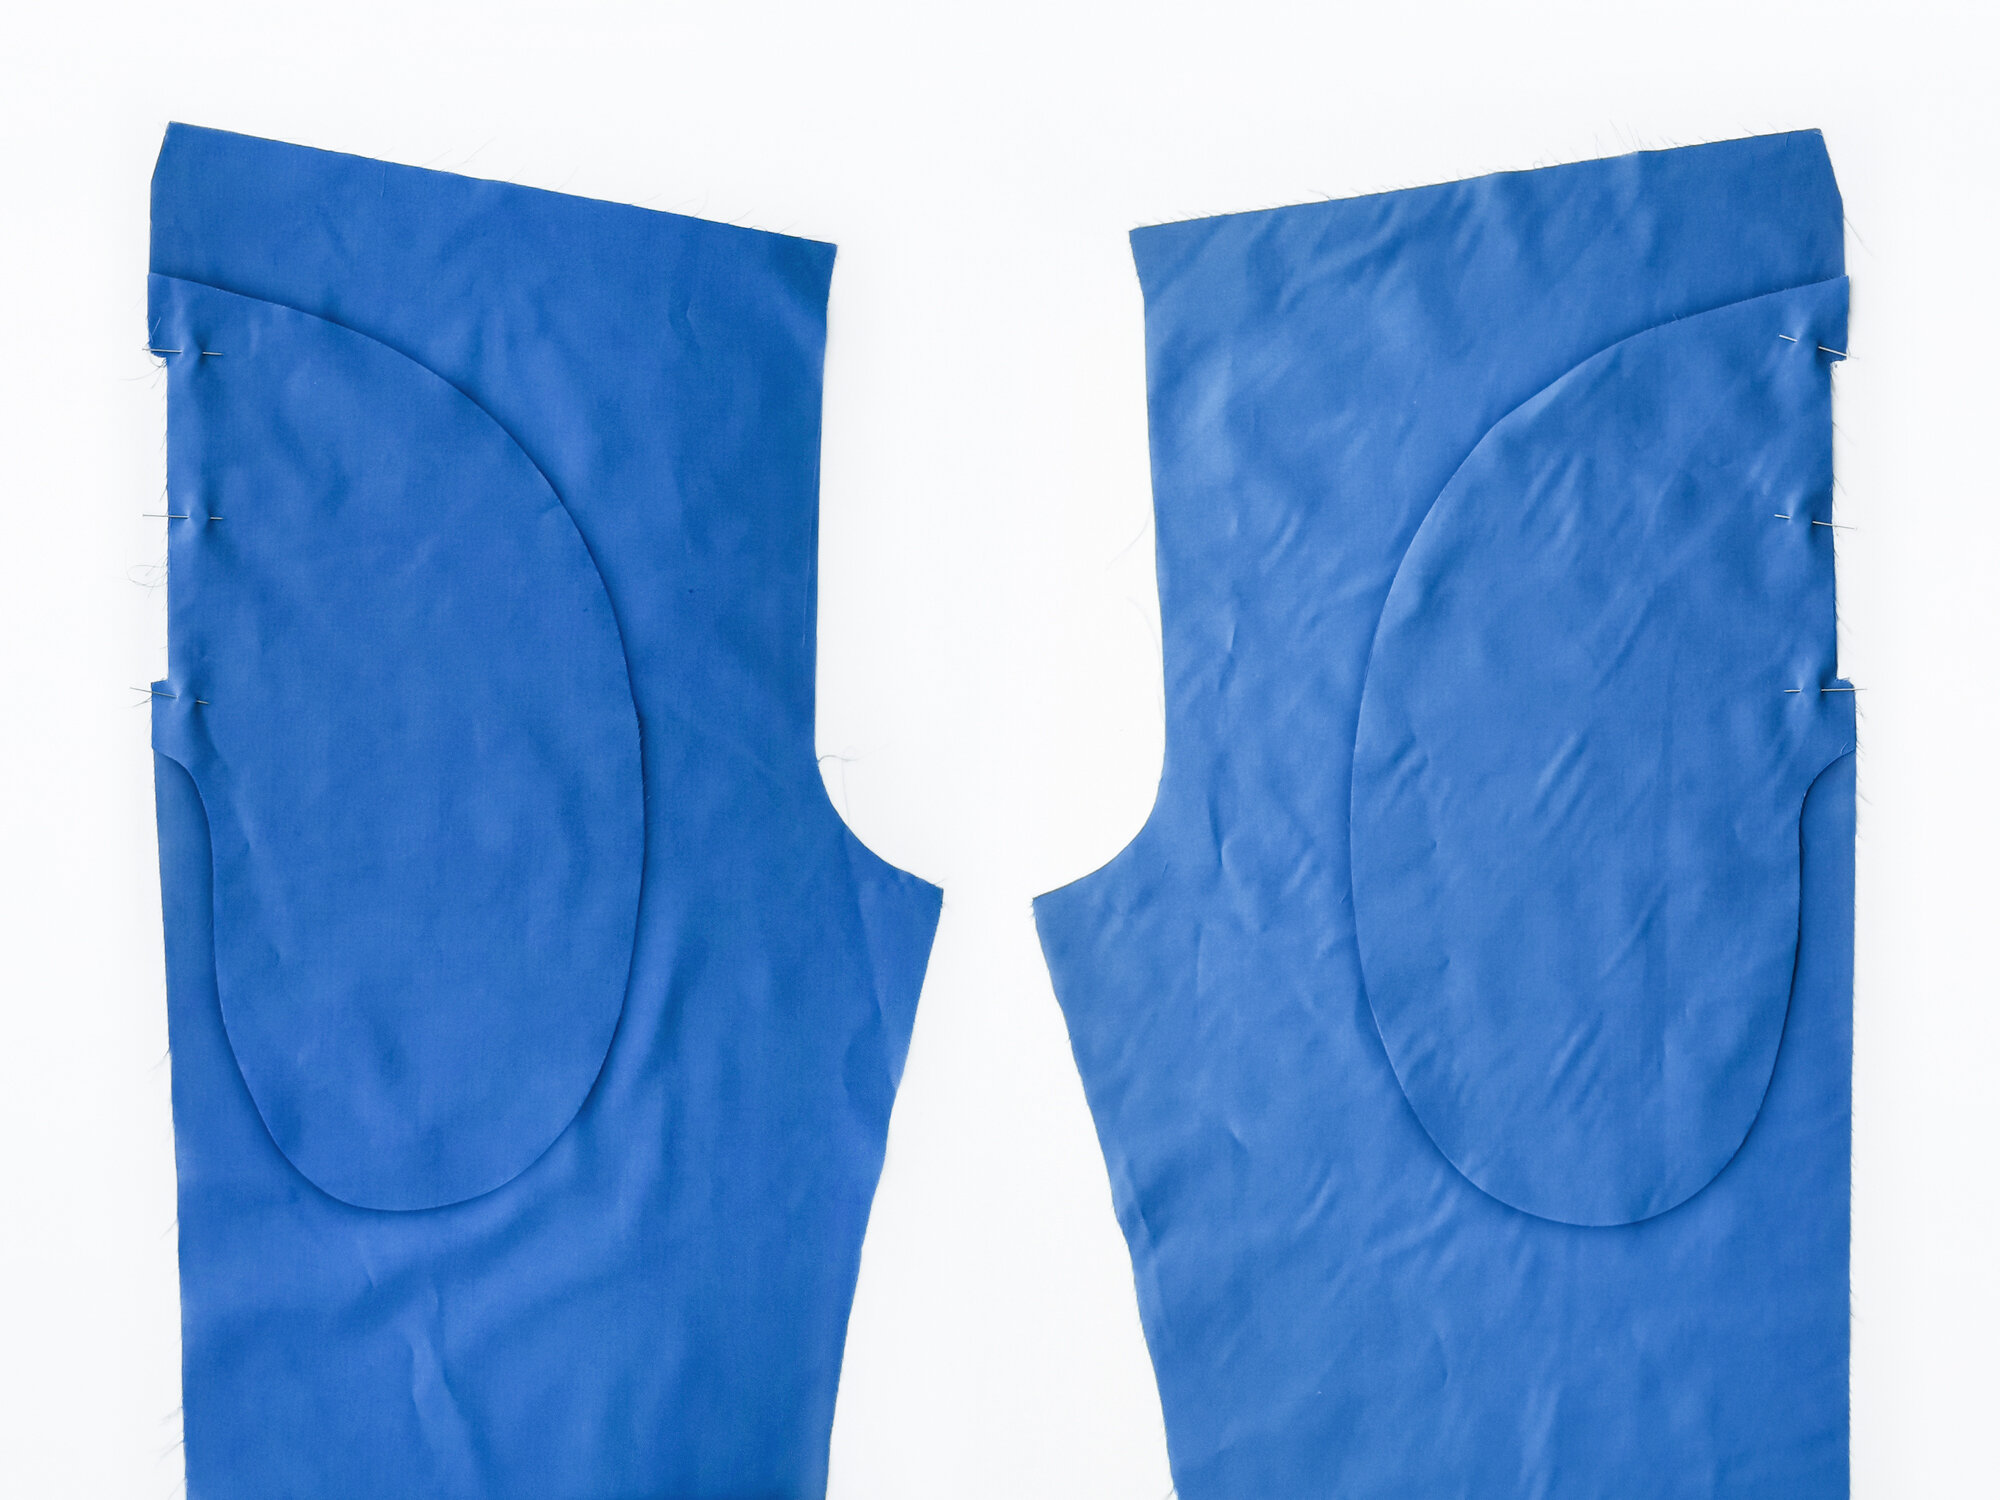
01. With right sides together, align the pocket bag that has the cut out section onto the front leg and pin in place. It is best to this at the same time to make sure you get a pair and not two lefts!
02. Stitch together around the hand opening.
03. Snip diagonally into both corners, to 1mm from the stitching. Take care not to cut through the stitching!
04. Turn the pocket bag to the inside and press, ensuring you get the corners laying flat. If they aren’t, you haven’t snipped in far enough.
05. Top stitch around the hand opening of the pocket, 2mm from the edge.
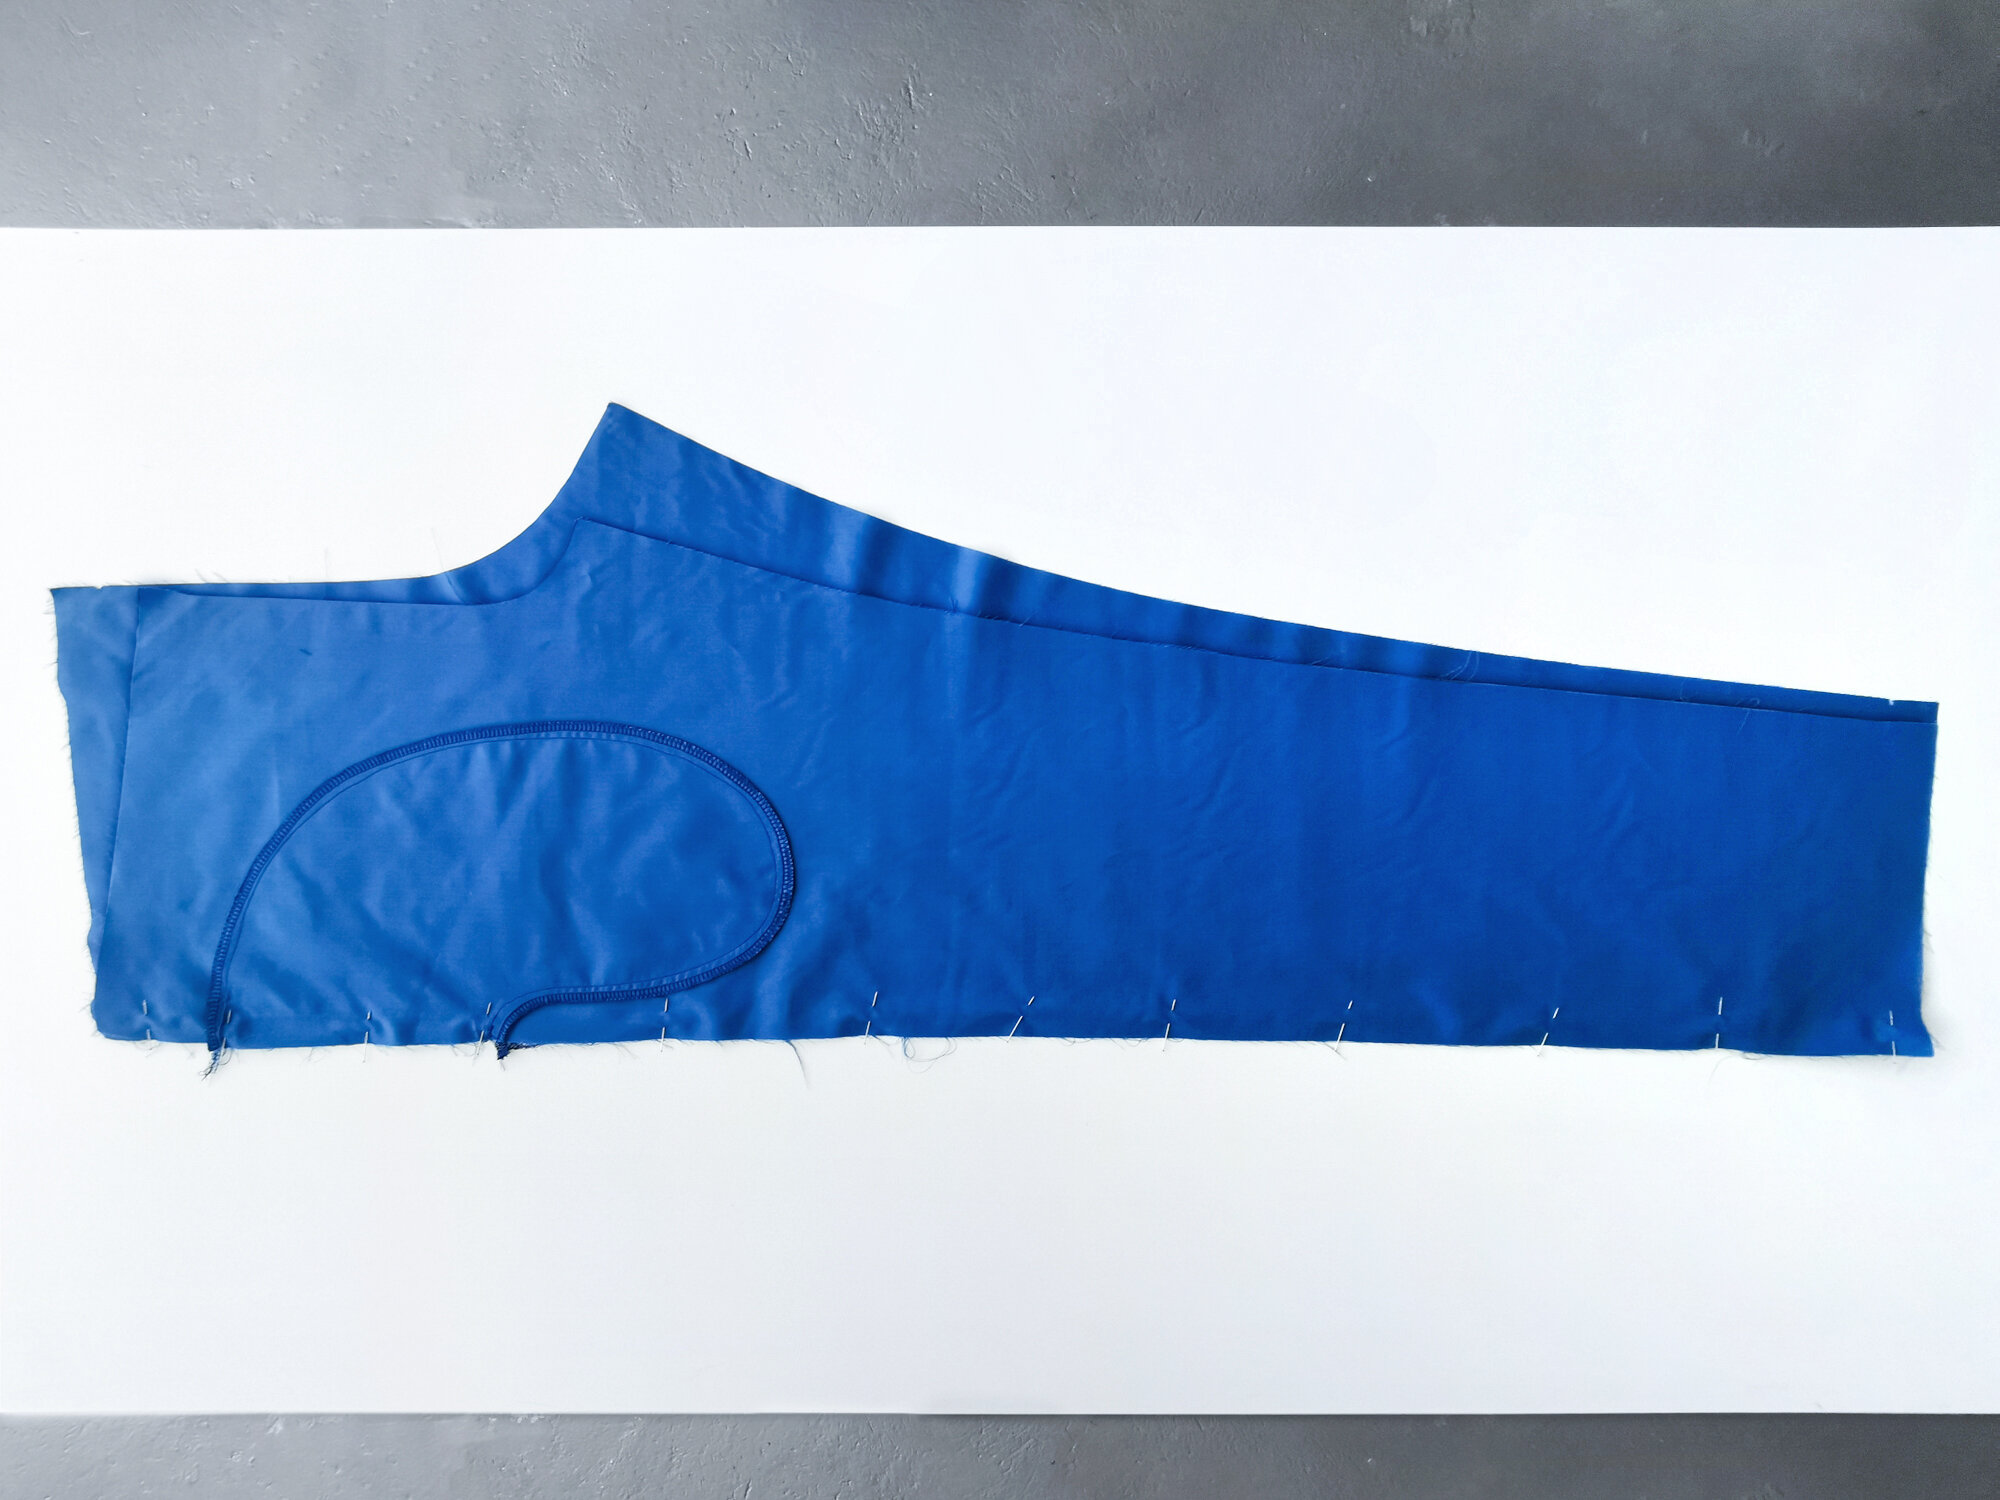
06. With right sides together, place the pocket bag that doesn’t have the cut out section together with the first pocket bag, and sew together around the curved edge. Overlock to finish. Take care not to catch the front trouser leg when sewing this step.
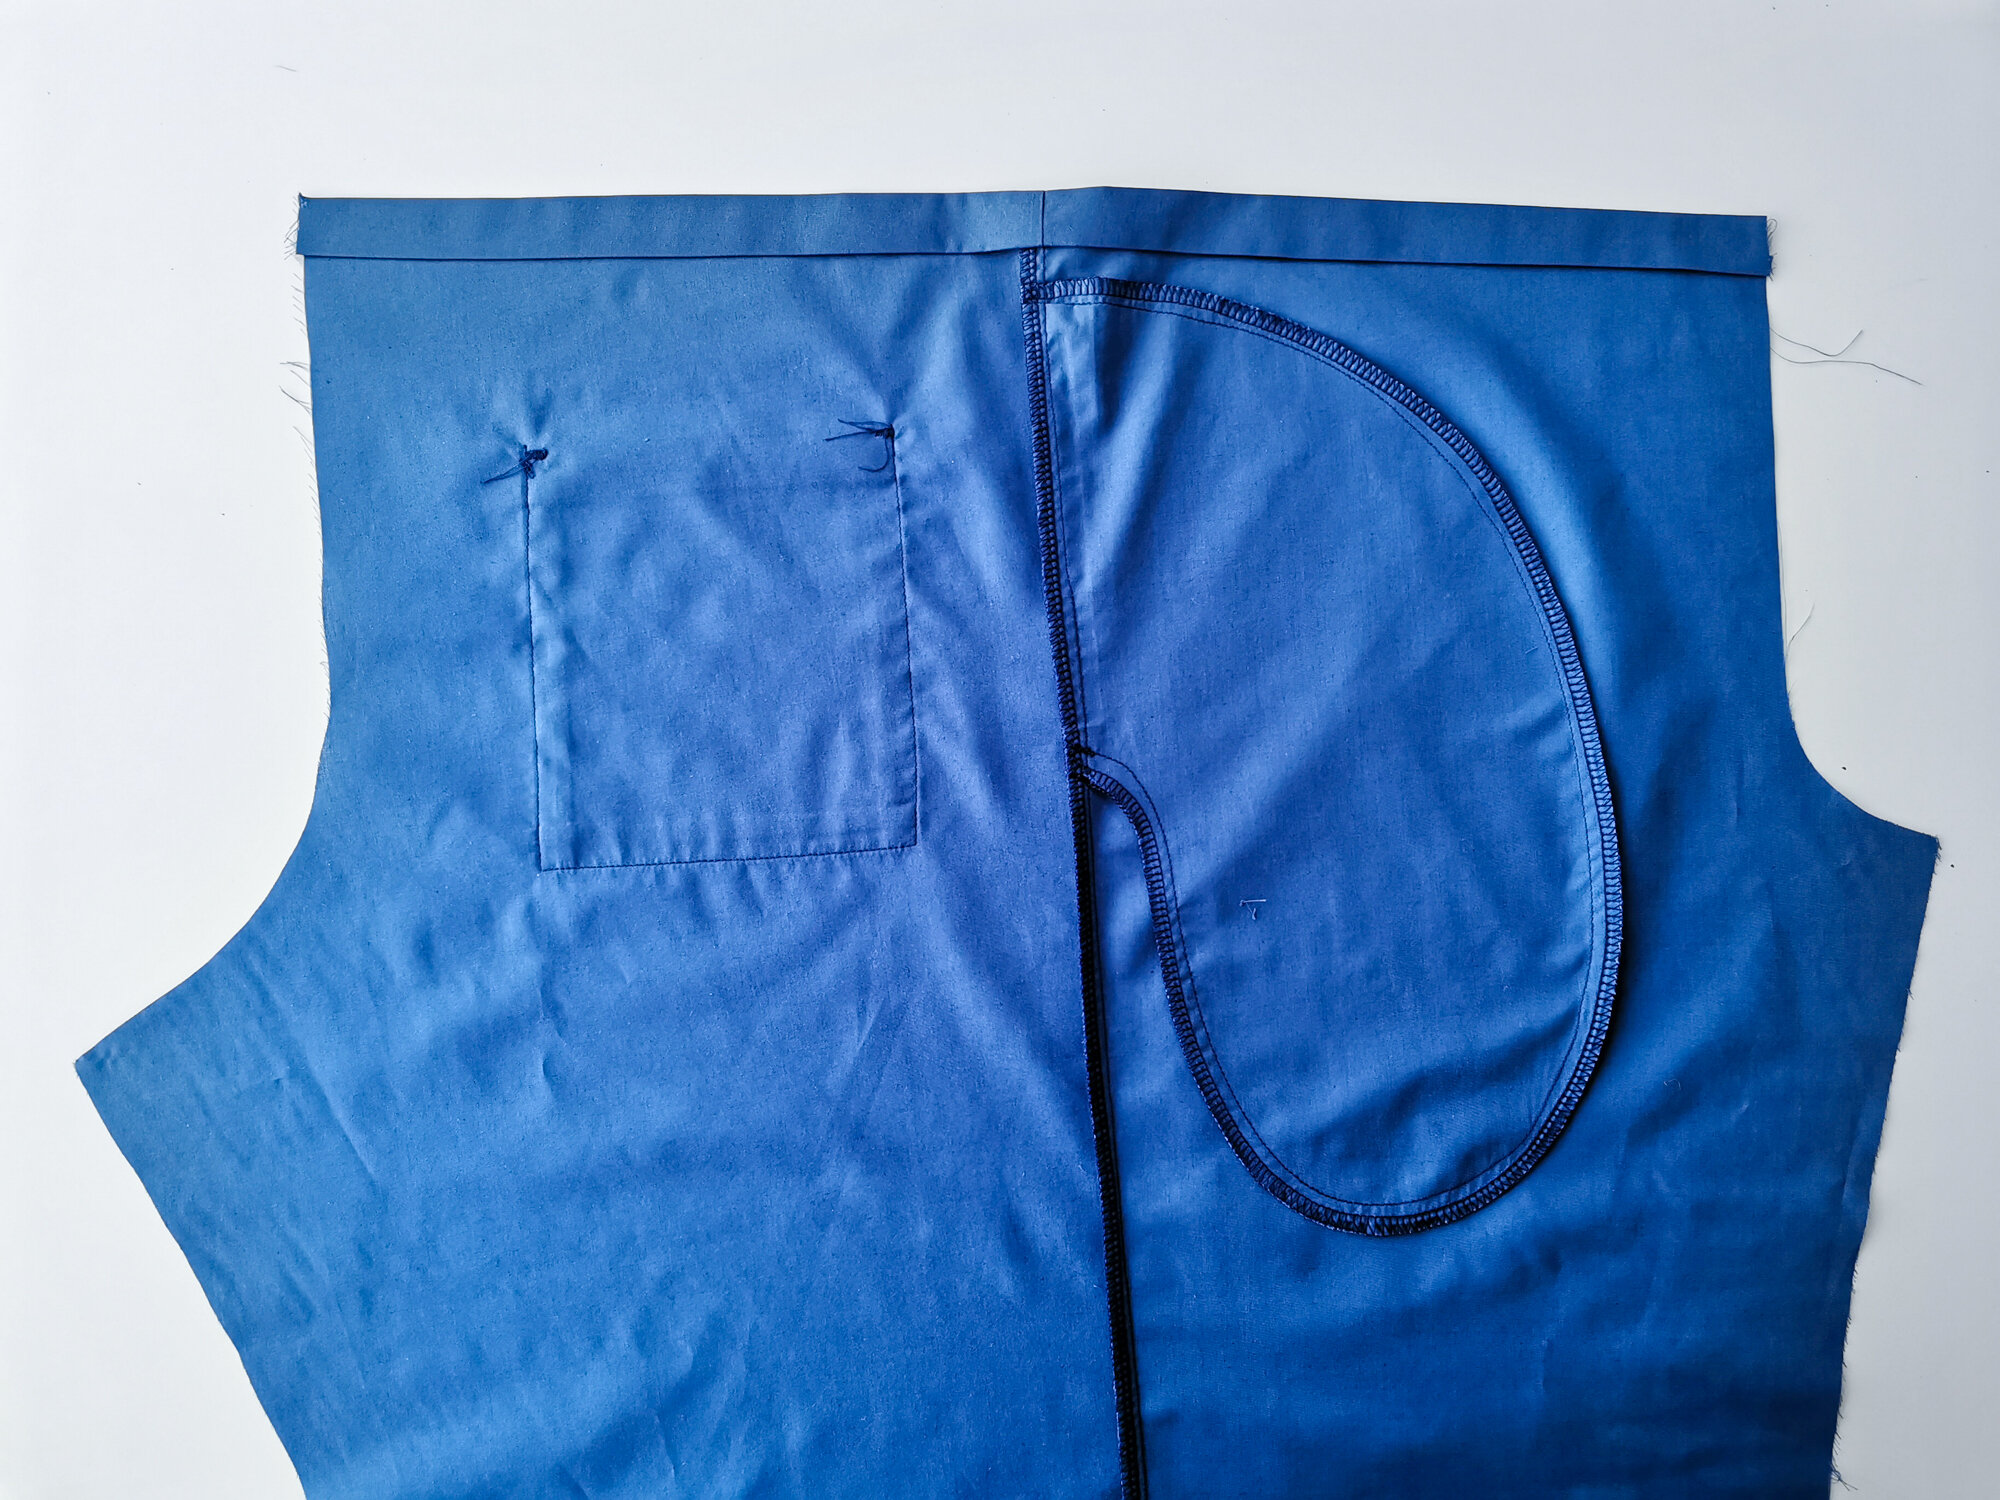
07. This is how the pocket will look from the right side. Repeat steps 1-6 for the other side.
08. Overlock around sides and bottom of patch pockets. Iron a 1cm fold to the upper edge of the patch pockets, press a second fold 2cm and topstitch 2mm from this fold.
09. Press the marked seam allowance (1.5cm) to the inside of the sides and bottom of the patch pockets.
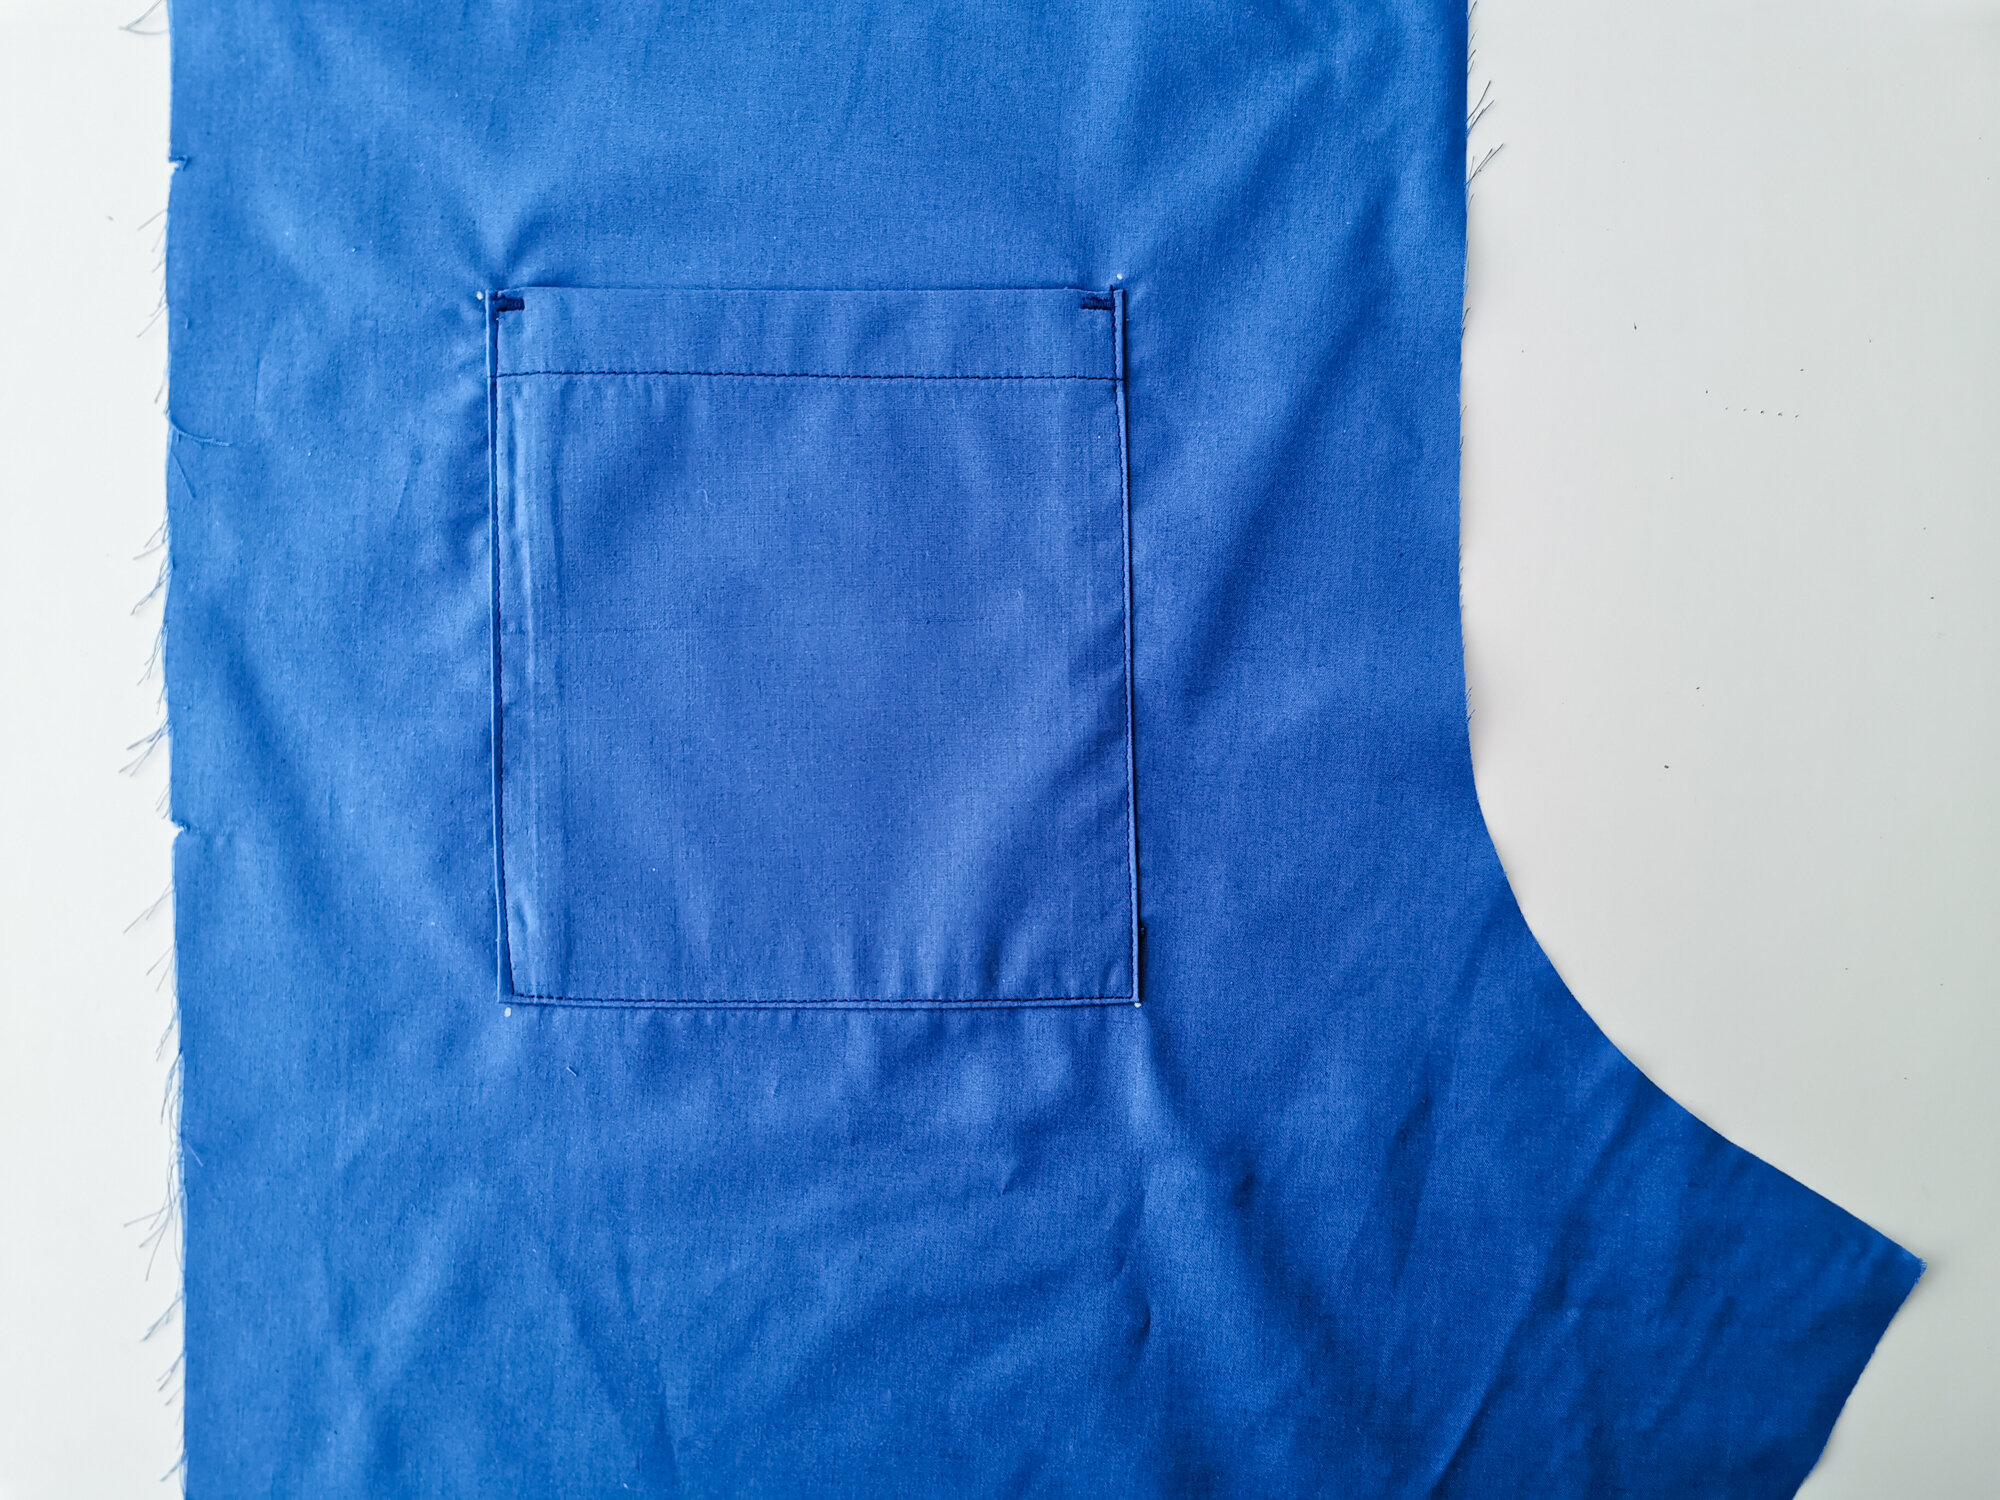
10. Pin the patch pockets to the right side of the back where marked on the back pattern piece.
11. Stitch 2mm from the folded edge around the sides and bottom. Bar tack at the top as shown in the photo, or sew a triangle stitch to reinforce the opening.
12. Lay the front and back legs right sides together, and pin down the outside leg seam. Match up the pocket openings in the side seams on the front with the corresponding notches on the back.
13. Stitch outside leg seams and overlock together. Press to the back.
14. Press the top of the trousers down 1cm to the inside, and then 2cm. Do not stitch. It just helps to do this now while the garment is flat. Please note – if you are using wider waist tape, then make the channel wider, up to 3cm.
15. Mark the button holes at centre front waist. They should finish 1.8cm long, and be positioned 2.5cm from the centre front cut edge, and start just below the second fold you just ironed. Please note – position your button holes in the centre of the channel if you are making it wider.
16. Iron a small piece of fusing on the wrong side, to cover the button hole you marked.
17. You may need an extra layer of fabric, use a scrap of the same fabric the scrubs are cut in. (I didn’t have any so I used calico and snipped away later). This gives the sewing machine two layers of fabric to go through, so that it doesn’t chew up the fabric.
18. IMPORTANT – sew a couple of test button holes on scrap fabric first before going for it in the real garment. Make sure you know which direction your sewing machine sews the button holes in, so that it doesn’t start sewing in the wrong position!
19. Now it is time to sew the real button holes, ensure the waistband fold is unfolded, you only need to sew through the one layer. Take a deep breath and away you go!
20. Cut the button holes open, taking care not to snip through the end bar tacks.
21. Pin the inside leg seams together. Sew and overlock. Press to the back. Repeat on other side.
22. Turn one of the legs the right way around, and then thread it inside the other leg. The crotch should now be positioned right sides together. Pin in place from centre front to centre back, taking care to match up the inside leg seams. Ensure that the waistband folds are opened out when pinning and sewing.
23. Sew the crotch. Then sew the crotch again over the same stitch lines. The crotch is always the first seam to go on a pair of trousers so it is always useful to sew the crotch twice! Overlock the crotch together.
24. Press the waist channel back into position (you should already have a good fold there) embroider size if you are doing so, then topstitch. Insert size label at centre back under channel stitch if you are using a label.
25. Press the hems to the inside 1cm and then 2cm and topstitch.
26. Using a safety pin, thread the cord through one button hole, all the way round the waist channel and back through the other button hole. Cords to hang down by 30cm on each side, when waist is flat.
27. Ensure the cord is centralised in the garment (That the tails are the same length at the front) and then topstitch down the centre back at the channel, ensuring that you stitch through the cord as well. This ensures it stays in place and doesn’t come out when it is being washed.
28. Drawstring ends if using tape should be double turned and stitched. Or if you are using cord, ends should be knotted.
Helen from Dot n Cross is volunteering with Cornwall Scrubs, answering the call to support our healthcare workers throughout the Covid 19 crisis.
To make a request for scrubs or to sign up as a volunteer visit Cornwall Scrubs
If you want to support us financially, £12 will fund a set of scrubs and help us keep this wheel turning. You can make a donation at Go Fund Me
Cornwall Scrubs is part of a nationwide movement called For The Love Of Scrubs. It has been set up by A&E nurse, Ashleigh Lindsell based in the Midlands. There are now 23,000 members and volunteers co-ordinating the effort all over the UK.
This is needed because many normally non scrubs-wearing staff are being deployed to scrubs-wearing areas. In combination with a need to change clothes more frequently and the influx of returning staff, all health trusts have been met with a global shortage of workwear such as scrubs as well as the PPE required to stay safe on the job.
The Cornish effort is led by Annie Lucas, owner of pop up sewing school Start to Stitch and founder of Kernow Sewcial, along with an amazing team of very skilled admins who have worked extremely long hours to get the project off the ground efficiently and professionally. It is a colossal team effort.
We hope to have made a minimum of 400 sets of scrubs by the time the pandemic is over but it looks like we may be able to achieve 600 or more and meet the growing demand across care homes, the hospital, GP surgeries and other healthcare settings in Cornwall.

